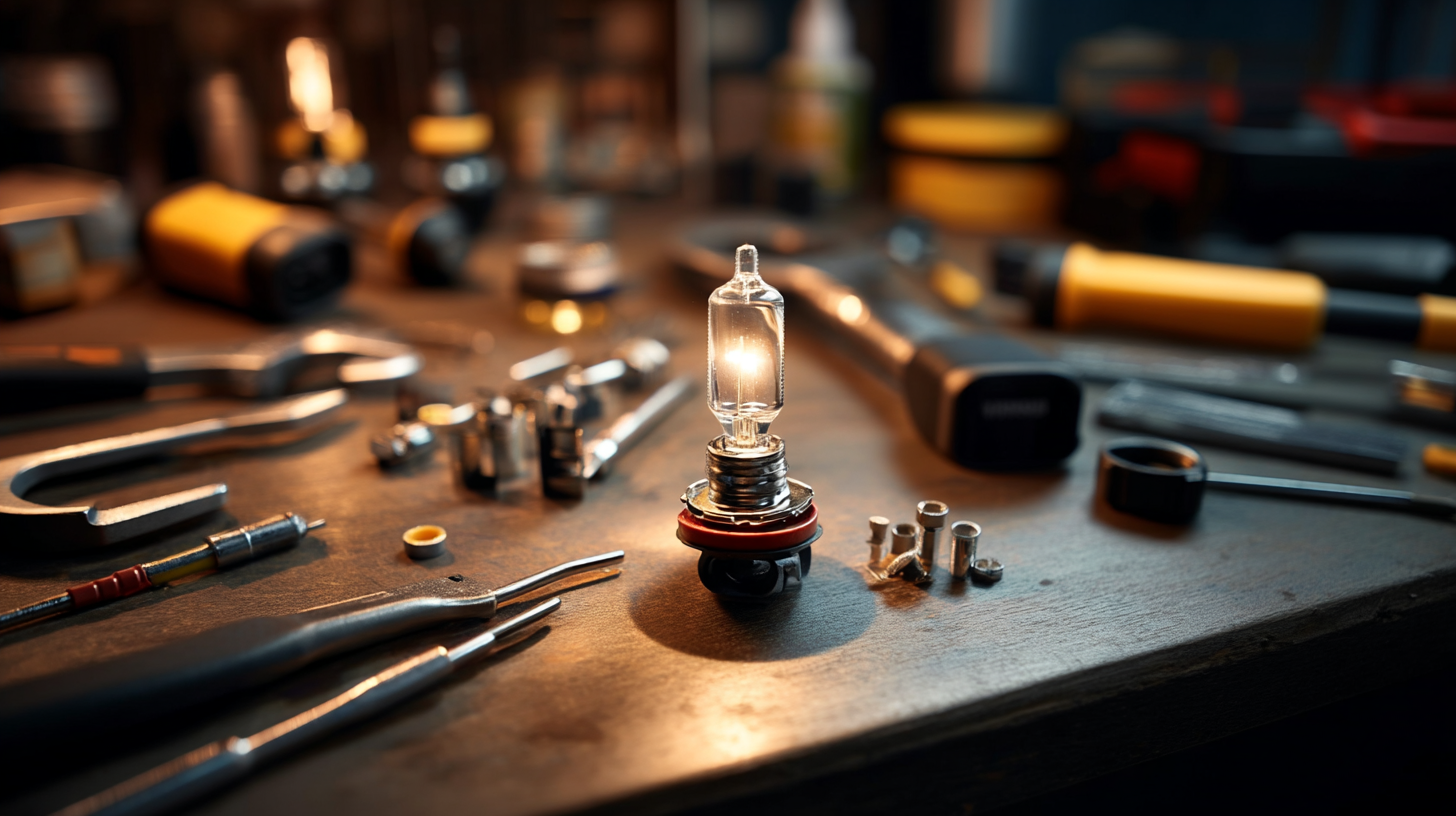
How-to Change Headlight & Bulb Replacement Guide

Tips for All Bulb Types
Headlights do more than light the road ahead; they shape how confidently you drive at night and how clearly others see you. Knowing how to replace them; choose the right components; aim them properly; and keep them maintained puts you in control of both safety and cost.
Understanding Headlight Technologies and How They Work
TL;DR
- Headlight types:
- Halogen ; cheap; hot; ~500–1,000 hrs.
- HID/Xenon ; bright; needs ballast; ~2,000–5,000 hrs.
- LED ; instant light; long life; many are sealed units.
- When to replace: dimming; flicker; color shifts (amber halogen; purple/blue HID); uneven beams; or cloudy/moist lenses.
- Basic replacement steps: let bulbs cool; access rear cap; unplug connector; release clip or quarter-turn; install correct bulb (do not touch halogen glass); refit cap; and test both beams.
- HID safety: disconnect battery; beware high voltage; check ballast if flicker continues; replace in pairs for color match.
- LED notes: use DOT-compliant assemblies; sealed units require full lamp replacement; do not retrofit LED bulbs in halogen housings; glare and non-compliance.
- GM quirks: H13 bulbs must be oriented correctly; expect tight spaces and hidden tabs; adaptive systems may need recalibration.
- Mopar quirks: Rams often need grille removal; Jeep adjusters via guided openings; moisture-prone ballasts near projectors.
- Aiming: park 25 ft from wall; cutoff slightly below lens height; hotspot just right of center; recalibrate adaptive systems if prompted.
- Maintenance: restore lenses; check dust caps and seals; use dielectric grease on connectors; reseal moisture before reinstalling.
- Troubleshooting: one side out = bulb or connector; both sides = fuse; relay; or BCM; CANbus errors may need resistors or decoders.
Quick Action Plan: Diagnose first; choose the right tech; replace safely; aim at 25 ft; maintain seals and connectors.
Halogen headlights explained
Halogen bulbsuse a tungsten filament inside a quartz capsule filled with halogen gas. When powered; the filament glows and the halogen cycle helps redeposit evaporated tungsten back onto the filament. This design is inexpensive and serviceable; which is why halogens remain common on daily drivers.
Typical life falls around 500 to 1,000 hours; often translating to 1 to 2 years of mixed driving. You will see warm; slightly yellow light; modest power draw; and straightforward replacement steps. The tradeoff is shorter life and more heat than newer technologies.
Common sizes include H11; 9005; 9006; H7; and H13. The base usually locks with a quarter turn; a spring clip or dust cap may retain the bulb. On many GM cars using dual-filament H13/9008 bulbs; careful orientation is critical. Many Mopar trucks separate low and high beams; which simplifies troubleshooting.
HID xenon headlights explained
HID/Xenon replaces the filament with an arc discharge across electrodes inside a xenon capsule. A ballast and igniter deliver high voltage to start the arc and regulate power. Output is bright and white with strong reach; lifespan often stretches to 2,000–5,000 hours.
Beam quality depends on an optic designed for HID. Retrofitting HID capsules into halogen housings is unsafe; glare and non-compliance. Factory HID on GM and Mopar often includes auto-leveling or adaptive elements; match OEM spec replacements to keep features and inspection compliance.
LED and laser headlights explained
LED headlightsgenerate light via semiconductors; they switch on instantly; run cool at the emitter; and deliver long service life; commonly 30,000–50,000 hours. Many assemblies are sealed; failure can require replacing the whole lamp rather than a bulb.
Aftermarket LED bulbs only perform correctly in housings engineered for them. Laser systems are rare; mostly high-end imports; and typically part of a sealed; high-cost module. For most drivers; OEM-style LED assemblies offer the best blend of reliability; efficiency; and aim stability.
Signs It Is Time to Replace Your Headlights
Dimming; flicker; and color shift
Bulbs age. Halogens dim and take on a darker; amber tone. HID capsules shift toward purple/blue before end-of-life and may flicker as the ballast struggles. LED modules usually fade gradually or fail segments. If one headlight goes out and the other still works; suspect the bulb. When both drop at once; think fuse; relay; wiring; or a control module. Flicker and color change often point to a bulb nearing retirement or a ballast starting to falter.
Cloudy lenses; cracks; and moisture
The clear plastic lens oxidizes from sun and road grit. It goes hazy and yellow; cutting usable light even if the bulb is fine. Moisture inside the lamp means a seal has failed. Condensation fogs the inside surface and can corrode connectors. Hairline cracks are easy to miss until nighttime reveals a streaked beam. Clean lenses regularly and address moisture early. If the lens is deeply crazed or the seal is compromised; a full assembly may be the smarter fix.
Uneven beam pattern and glare
Mis-aimed headlights give you a bright patch that does not help and a glare line that irritates everyone else. If you installed a new bulb and night driving suddenly feels worse; aim is the likely culprit. A distorted beam can also indicate a loose internal shield or reflector. On vehicles with adaptive systems; software faults can leave lamps stuck high or low; which looks like mis-aim but stems from a control issue. Check aim after any replacement work and whenever you notice more flash-from-oncoming drivers.
Safety Prep and Tools for Headlight Replacement
Essential tools; including a screwdriver
- Phillips screwdriver
- Small flat screwdriver for clips
- 10 mm socket for common fasteners
- Plastic trim tool for push pins
- Nitrile gloves to keep halogen glass clean
- Flashlight for tight quarters
- Multimeter for electrical checks
- Torx bits and a clip tool for fascia work
Battery precautions and bulb handling
Turn lights off and let them cool. Disconnect the negative battery cable when working around HID ballasts or when your hands will pass near spinning fans or exposed terminals. Never touch halogen glass with bare hands; skin oils create hot spots that shorten life. Use the holder or gloves and wipe smudges with alcohol. For HIDs; avoid bending the arc tube and protect the igniter connector from moisture. LEDs often include drivers; keep wiring tidy and away from heat.
Identifying the right bulb size and type
Confirm the exact bulb. The owner’s manual; parts catalogs; or the markings on the old bulb tell you the size. Common low-beam sizes include H11 and 9006. Many GM models use H13/9008 dual-filament bulbs. Mopar trucks often split low and high beams across different sockets. Match the type to the housing design. Swapping technologies without a compatible housing hurts output and can violate regulations. If your assembly is sealed LED; you are replacing the whole lamp; not a bulb.
How to Replace Headlights Step by Step
Halogen bulb replacement process
- Open hood and locate the rear of the headlight. Remove the dust cap. Identify the connector and retainer clip.
- Unplug the connector. Release the clip or quarter-turn the bulb counterclockwise. Pull the bulb straight out.
- Install the new bulb. Align tabs; insert; and turn clockwise until it locks. Do not touch the glass.
- Reconnect the connector. Refit the dust cap. Repeat on the other side so light color and brightness match.
- Turn on low and high beams to test. Aim at 25 ft and adjust as needed.
Access tips: Some housings allow rear access with the airbox or battery slid aside. Others pull forward with screws and a retaining pin. Wheel-well access is common on compact crossovers. On GM sedans; loosening the washer reservoir can create room. On Mopar trucks; partial grille removal often exposes the lamp back.
HID bulb and ballast replacement steps
- Disable power. Disconnect the negative battery terminal and wait a few minutes for the ballast to discharge.
- Access the rear of the projector. Remove the dust cap. Disconnect the igniter and ballast leads.
- Release the bulb retainer. Pull the HID capsule straight out without twisting; avoid touching the arc tube.
- Install the new capsule. Seat fully; reconnect igniter and ballast in the original orientation.
- Inspect the ballast. If flicker or no-start persists; replace the module. Reassemble and test.
Note: Factory HID on GM and Mopar often integrates auto-leveling. If a fault appears after service; scan for codes and match OEM-spec parts. Replace capsules in pairs for color match.
LED bulb and assembly replacement steps
- Determine whether your vehicle uses replaceable LED bulbs or a sealed LED assembly.
- For replaceable bulbs; access the rear cap; unplug the connector; remove bulb and any driver; install the matched LED with correct emitter orientation.
- For sealed assemblies; remove fascia fasteners as needed; extract the headlight; install an OEM or DOT-compliant unit.
- Route wiring cleanly; avoid hot components; verify DRL and low/high beam operation. Some vehicles require relearn or calibration.
Warning: LED conversions in halogen housings rarely deliver the intended beam; glare and non-compliance. Use optics engineered for LED.
Headlight Assembly Replacement and Access Tips
Bumper; grille; and wheel well access
Headlight assemblies sometimes tuck under the bumper cover or lock behind the grille. Access often starts with:
- Upper radiator cover clips
- Grille screws
- Bumper corner retainers at the wheel arch
- Pull the bumper corner outward gently
- Unplug fog lamps and parking sensors
With the fascia loosened; the headlight usually releases with two top bolts and a hidden lower stud. Wheel-well access helps on compact cars; peel back the liner to reach the bulb or lamp rear. Use a trim tool to avoid breaking push pins.
How to install a headlight retaining clip
- Orient the clip’s hinge toward the bulb base.
- Slide the ends under the tabs.
- Press until the latch clicks.
- Confirm the bulb sits flat.
- Test the beam against a wall; reseat if the cutoff looks fuzzy or tilted.
How to change a car headlight bulb (Toyota Corolla example)
- Turn off the lights.
- Remove the dust cap and unplug the connector.
- Rotate the bulb a quarter turn and pull it out.
- Install the new bulb by aligning tabs; twist to lock; reconnect; and refit the cap.
On tight battery-clearance models; loosen the hold-down and slide the battery slightly to create space. Replace bulbs in pairs for color and output match. Aim the lamps after service to restore reach and prevent glare.
GM Headlight Quirks and Best Practices
Access and fastener locations on common GM models
GM packaging often hides a fastener in plain sight. Expect upper bolts under the radiator cover trim; a lower locating pin behind the bumper corner; and sometimes a side stud near the fender. Mid-2010s sedans may demand washer reservoir or airbox loosening for rear access.
Many GMC and Chevrolet trucks use tabbed retainers. Lift the tab; slide the lamp forward; and the assembly releases. Keep track of push-pin styles; mixing them causes loose trim or rattles later. Some GM SUVs route a wiring pigtail through the lamp; unplug before pulling to avoid stretching the harness. On H13 dual-filament systems; use a pocket screwdriver to release the stiff lock tab safely. Replace dust caps carefully; a warped cap invites fogging.
Projector; adaptive; and software considerations
GM projectors with HID or LED often pair with adaptive features. If a fault appears after service; run calibration through the Body Control Module. Internal lens cracking on late-model assemblies may result from heat or stress rather than impact; handle replacements with care to preserve warranty coverage.
Mopar Headlight Quirks and Best Practices
Ram and Jeep access and adjustment notes
Ram trucks frequently hide a headlight fastener behind the grille. Remove upper clips; pull the grille; and release the lamp tabs. Wheel-well access is common. On some trucks; removing the air inlet snorkel frees space for the low-beam. Jeep models often integrate vertical and horizontal adjusters that require a long Phillips or hex driver. Take small turns and test against a wall. Mopar housings usually include a fixed internal shield; so aim changes affect height and lateral position only.
HID ballast module and aim constraints
HID-equipped Mopar vehicles mount ballasts close to the projector. Moisture or corrosion near the connector causes flicker or no-start. Replace suspect modules with OEM or full-spec parts. Stellantis recalls on certain BEV assemblies highlighted inaccessible aim adjusters; underlining how poor hardware access can become a compliance issue. When adjusters are blocked; service campaigns may be required.
Headlight Aiming and Alignment in the U.S.
Home aiming procedure at 25 feet
Aim on level ground with a flat wall. Inflate tires; set normal fuel; and remove heavy cargo. Measure from the ground to the center of each low-beam lens; mark that height on the wall. Park 25 feet away; turn on low beams; the top of the cutoff should sit slightly below the tape line. The hotspot should land just right of center for right-hand traffic. Adjust both sides until the pattern mirrors evenly.
Vertical and horizontal adjuster use
Vertical adjusters raise or lower the cutoff; horizontal adjusters move the hotspot left or right. Use quarter turns and re-check. If the adjusters bottom out; inspect for mis-seated bulbs; abnormal load; or bent assemblies. For adaptive systems; recalibrate after mechanical aim. Most OEMs specify about a 2 percent drop over 25 feet to reduce glare. Check local inspection specs to confirm.

Maintenance Tips for Long-Lasting Headlights
Cleaning and lens restoration
Clean lenses with mild soap and water. Avoid abrasives that gouge the plastic. When haze appears; use a restoration kit with progressive sanding and a UV seal coat. Restoration restores brightness and delays costly assembly swaps. If the lens has deep pitting or internal stress marks; a full replacement outperforms any restoration. Regular washing slows oxidation.
Moisture prevention and dielectric grease
Moisture comes from tired seals or loose caps. Inspect dust caps and gaskets when replacing bulbs. Replace cracked pieces. A small dab of dielectric grease on connectors prevents oxidation; keep grease off glass. Drain; dry; and reseal if water collects inside. Persistent leaks usually trace to a crack or vent issue.
Replace headlight cover vs. full assembly
Many lamps bond the lens to the housing; replacing only the cover requires heat and reseal skill. If the lens is serviceable; restoration or a full assembly swap is cleaner. Sealed LED assemblies push toward full replacement when output drops. For HID projectors with internal haze; replacement restores the cutoff sharpness drivers expect.
Service Options for Replacement
AutoZone and O'Reilly installation options
Some auto parts retailers offer basic bulb installation when access is straightforward. Policies vary by store and vehicle design. If the job involves bumper removal or high-voltage HID systems; most locations will refer you to a shop. Many stores help with selecting the correct bulb size and type and provide guides or videos showing where clips and retainers hide. Call ahead to confirm what your local store can do the same day.
Troubleshooting Headlight Issues After Replacement
Headlight bulb stuck in housing
Stuck bulbs happen when tabs wedge or clips cock sideways. Do not force a twist. Push the bulb inward slightly to unload the tabs; then rotate. If a spring clip is bent; straighten and re-seat. Apply a thin smear of dielectric grease on the base for next time; but avoid contaminating glass. For stubborn dust caps; warm them gently to soften the seal and prevent tearing.
When one headlight is out vs. both
One lamp out usually means a bulb or connector issue. Both out usually points to a fuse; relay; or BCM fault. Swap sides with a known good bulb to confirm. If the dead side lights up; the bulb was bad. If not; trace voltage from the fuse block to the connector with a multimeter. On HID systems; swap ballasts left to right to see whether the issue follows the module.
Replacing Essential Non-Headlight Bulbs
Brake light bulb replacement steps
- Open the trunk or tailgate; remove the lamp access panel; identify the brake light socket.
- Twist the socket counterclockwise; pull the bulb straight out; install the new bulb fully.
- Reinstall the socket; test with the pedal or a helper standing behind the vehicle.
Replace in pairs for even brightness and color. If the brake warning stays lit; check the third brake lamp and the fuse.
Interior door light bulb replacement steps
- Pry the lens gently with a plastic trim tool; avoid scratching the panel.
- Remove the small wedge bulb; install the correct replacement; test before snapping the lens back.
LED upgrades work well for map and dome lamps. Use CANbus-safe bulbs to prevent flicker or ghost glow.
License plate light bulb replacement steps
- Access the lamp from the bumper or trunk edge; release the clip; remove the socket.
- Swap the bulb; reinstall; confirm crisp white light on the plate.
Keep color temperature close to OEM to avoid a cold blue look that attracts attention.
Best practices for non-headlight bulb replacement
- Match bulb sizes to the socket.
- Avoid mixing color temperatures across the vehicle.
- Verify polarity when upgrading to LED; test for dimming or flicker.
- Clean contacts and apply dielectric grease to reduce corrosion.
FAQs
Can you replace a headlight yourself?
Yes. Most halogen bulbs are easy DIY tasks requiring only hand tools. HID and LED assemblies are more complex because of high voltage and tight access. If bumper removal or calibration is needed; a professional shop can ensure correct aim and safety.
Will AutoZone change my headlight?
Some locations assist with simple replacements when access is open and the bulb is purchased there. For vehicles requiring disassembly; HID systems; or assembly swaps; they typically recommend a service shop.
Conclusion
Headlights tie safety; visibility; and confidence together every time you drive after dark. Once you understand how each bulb type behaves; Halogen; HID; or LED; you can select the right setup for your vehicle and driving needs. Regular maintenance; correct aiming; and genuine components keep light output strong and compliant.
For most drivers; halogen replacements are the simplest DIY fix; while HID or sealed LED systems often benefit from professional handling to ensure proper calibration and longevity. Whether you do it yourself or at a shop; well-maintained headlights not only help you see the road—they make sure everyone else sees you clearly too.
About World Parts Direct
World Parts Direct is your go-to source for genuine OEM parts for GM and MOPAR vehicles. We make it easy to order factory-original parts online — shipped fast, accurately, and backed by real human support.
Every item we sell comes brand new in the manufacturer’s original packaging. Whether you’re handling routine maintenance, collision repair, or a full restoration, our parts professionals provide VIN-verified fitment support to ensure you get exactly what you need.
Serving drivers and repair shops worldwide, we proudly support brands like Chevrolet, GMC, Cadillac, Buick, Dodge, Chrysler, Jeep, and Ram. Shop confidently at WorldPartsDirect.com.